
Homemade Ice Cream: A Guide to Crafting Frozen Perfection
Homemade Ice Cream: A Guide to Crafting Frozen Perfection
There’s something magical about homemade ice cream that store-bought varieties simply can’t replicate. The texture is silkier, the flavors more pronounced, and the satisfaction of creating something from scratch is its own reward. Whether you’re working with a traditional churning machine or exploring no-churn methods, making ice cream at home is far more accessible than most people realize.
Understanding the Basics
At its core, ice cream is a frozen emulsion of fat, sugar, and air. The fat typically comes from cream and egg yolks, sugar provides sweetness and affects texture by lowering the freezing point, and air is incorporated during the churning process to create that characteristic light, scoopable consistency. Understanding this trinity helps you troubleshoot and customize recipes to your liking.
The base mixture, called a custard when it contains eggs, should be thoroughly chilled before churning. This isn’t just tradition—cold bases churn faster and incorporate less ice crystals, resulting in smoother ice cream.
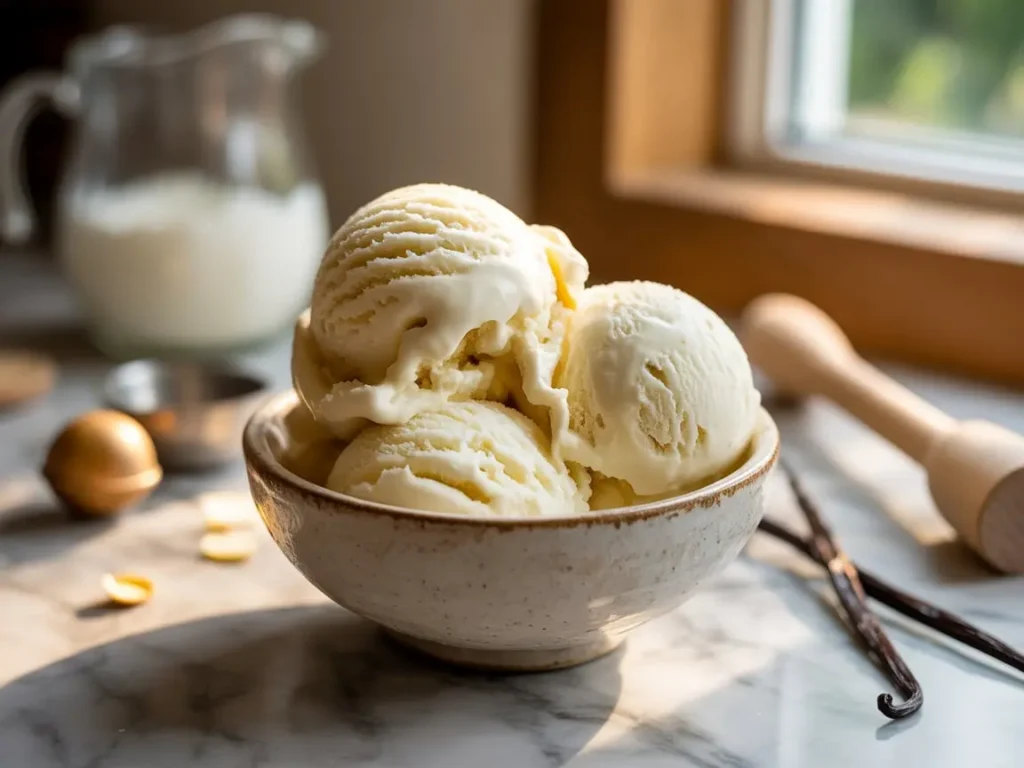
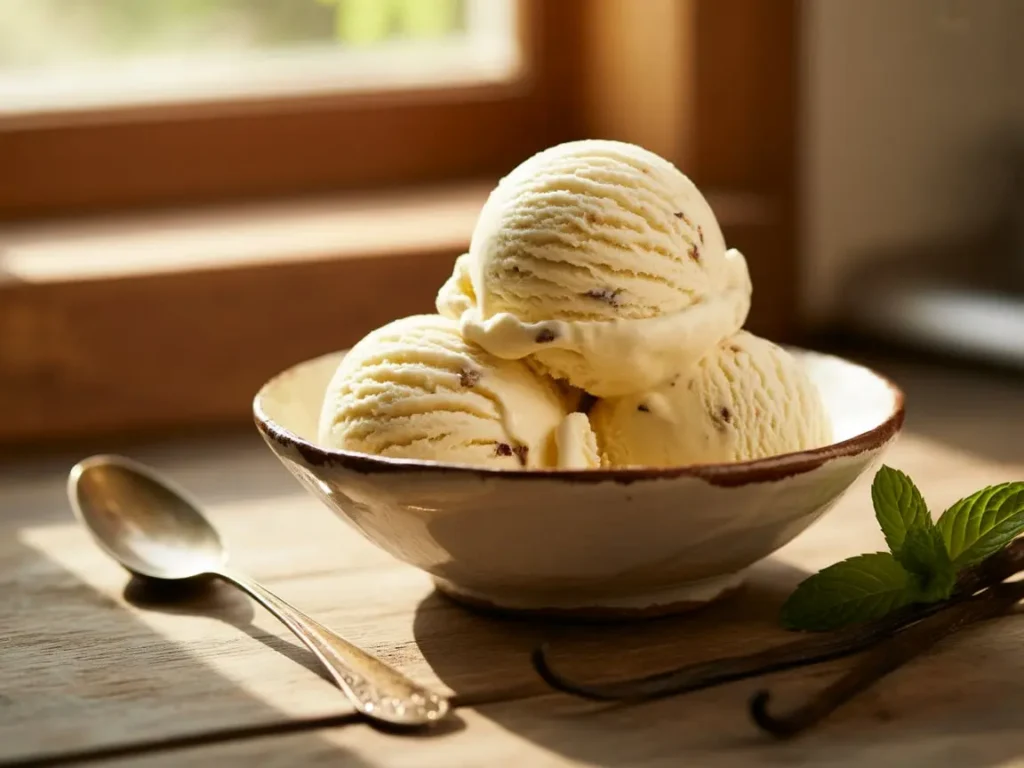
Classic Vanilla Bean Ice Cream
This is the foundation recipe every ice cream maker should master. Heat two cups of heavy cream and one cup of whole milk with half a vanilla bean (split and scraped) until it just begins to steam. Meanwhile, whisk six egg yolks with three-quarters cup of sugar until pale and thick. Temper the eggs by slowly adding the hot cream mixture while whisking constantly, then return everything to the pot and cook over medium-low heat until the mixture coats the back of a spoon.
Strain the custard to remove any cooked egg bits, stir in another cup of cold heavy cream, and refrigerate for at least four hours or overnight. Churn according to your machine’s instructions, then freeze until firm.
No-Churn Chocolate Ice Cream
For those without an ice cream maker, the no-churn method offers remarkable results. Whip two cups of heavy cream to stiff peaks. In a separate bowl, mix one 14-ounce can of sweetened condensed milk with half a cup of unsweetened cocoa powder and a teaspoon of vanilla extract until smooth. Gently fold the whipped cream into the chocolate mixture in three additions, being careful not to deflate the cream.
Pour into a loaf pan, cover with plastic wrap pressed directly against the surface, and freeze for at least six hours. The result is surprisingly creamy, with a texture that rivals churned ice cream.
Fresh Strawberry Ice Cream
Fresh fruit ice creams require a slightly different approach to prevent iciness. Macerate two cups of hulled, chopped strawberries with half a cup of sugar for 30 minutes. Puree half the berries and leave the rest chunked. Make a standard custard base with two cups cream, one cup milk, three-quarters cup sugar, and five egg yolks.
Once the custard is chilled, stir in the strawberry puree and chunks along with a tablespoon of lemon juice to brighten the flavor. Churn as usual. The acid from the lemon not only enhances the strawberry flavor but also helps prevent the fruit from freezing into hard chunks.
Salted Caramel Swirl
This sophisticated flavor combines a vanilla base with homemade caramel. For the caramel, melt one cup of sugar in a heavy-bottomed pan until deep amber, then carefully whisk in three-quarters cup of warm heavy cream and a teaspoon of flaky sea salt. Allow it to cool completely.
Prepare your favorite vanilla base and churn it. As you transfer the churned ice cream to a container for freezing, drizzle in the cooled caramel and use a knife to swirl it through. Avoid overmixing—distinct ribbons of caramel are far more appealing than a uniform tan color.
Coffee Gelato
Italian gelato has less air and fewer egg yolks than American ice cream, resulting in a denser, more intensely flavored product. Heat two and a half cups of whole milk with one cup of heavy cream and half a cup of whole coffee beans. Remove from heat, cover, and steep for an hour. Strain out the beans, reheat the mixture, then temper it into four egg yolks whisked with three-quarters cup of sugar.
Cook until slightly thickened, chill thoroughly, and churn at a slower speed than you would for ice cream. The result should be dense and creamy, perfect served slightly softer than typical ice cream.
Mint Chocolate Chip
Forget the artificial green color and chemical taste of commercial mint chip. Steep two cups of fresh mint leaves in your heated cream mixture for 30 minutes, then strain them out completely. The flavor will be clean and herbaceous. Add green food coloring only if you must, but the natural pale cream color is actually more sophisticated.
Prepare a standard custard base, chill it, and churn. In the last minute of churning, add four ounces of chopped dark chocolate—the movement of the machine will break it into irregular chips that are far superior to the uniform chips from a bag.
Troubleshooting Common Issues
If your ice cream is icy, you likely didn’t chill the base enough before churning, or there’s too much water content in your recipe. Fat is your friend in ice cream making—don’t be tempted to use low-fat dairy.
If it’s too hard to scoop straight from the freezer, you may have over-churned it or your freezer is too cold. Let it sit at room temperature for five to ten minutes before serving.
Grainy texture usually indicates that your custard overheated and the eggs scrambled slightly. Always use medium-low heat and stir constantly.
Storage and Serving
Homemade ice cream is best consumed within a week or two. Press plastic wrap directly against the surface before covering with a lid to prevent ice crystals from forming. Store it in the back of the freezer where temperature fluctuations are minimal.
For the best texture, remove ice cream from the freezer about ten minutes before serving. It should be soft enough to scoop easily but not melting.
The Joy of Experimentation
Once you’ve mastered these basics, the world of homemade ice cream opens up. Toast nuts and fold them in. Swirl in fruit compotes. Steep tea leaves or spices in your cream. Crumble in cookies or brownies. The beauty of making your own is that you’re limited only by your imagination and your willingness to experiment.
The difference between homemade and commercial ice cream isn’t just about ingredients—it’s about the care and intention you bring to the process. Each batch is an opportunity to create something uniquely yours, something that can’t be bought at any store.